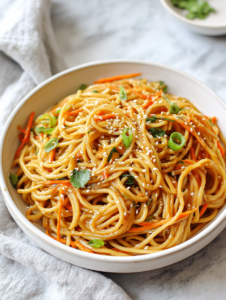
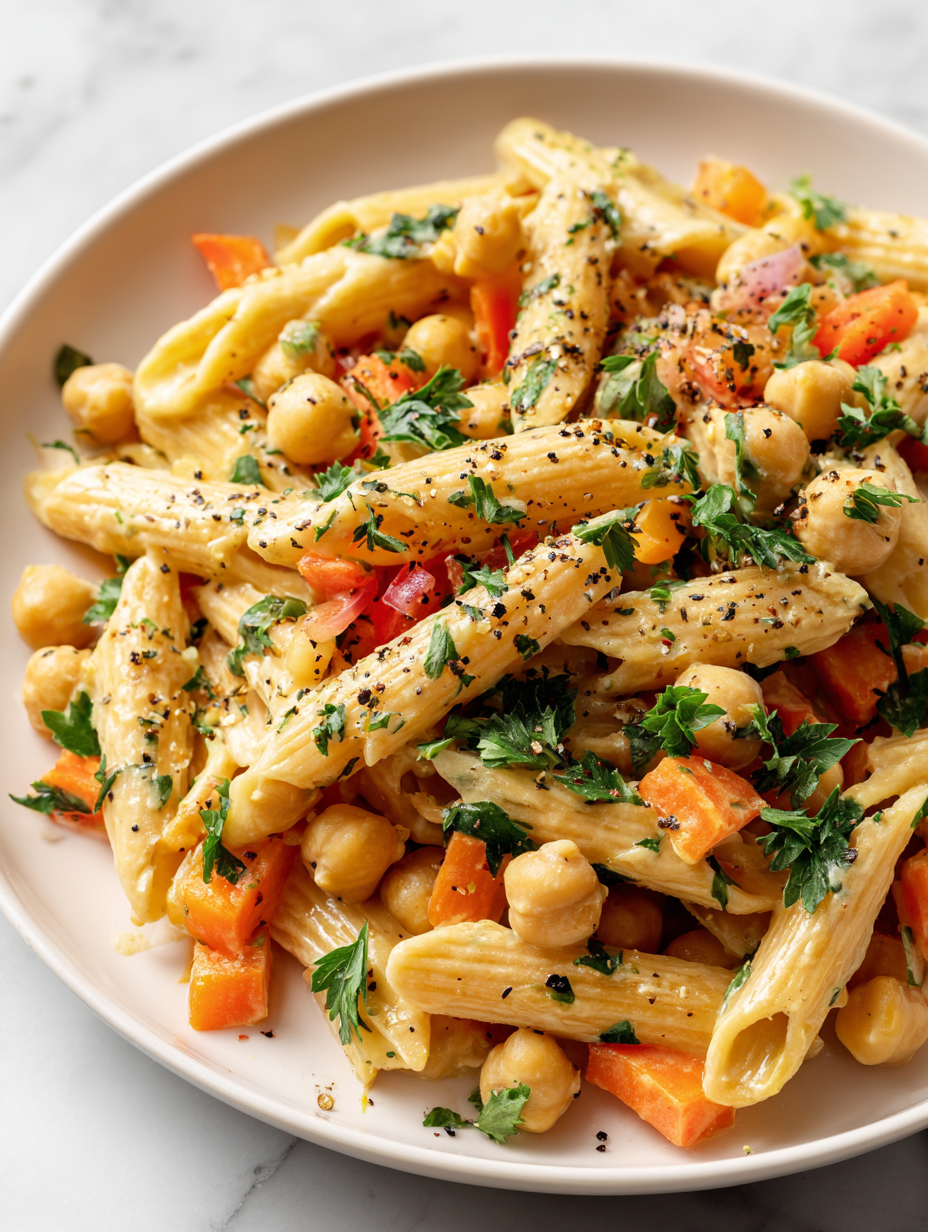
This vegan chickpea pasta is my go-to when I want something hearty but don’t want to fuss in the kitchen. It’s surprising how a can of chickpeas, blended into a silky sauce, can turn a simple pasta into something so satisfying. No dairy, no soy, just pure plant-based comfort that hits all the right notes after a busy day.
I stumbled on this recipe during one of those chaotic evenings when I needed dinner fast but also wanted it to feel nourishing. The creamy texture from the chickpeas, with a hint of garlic and lemon, makes every bite feel indulgent. It’s become a weekly habit, especially when I crave something wholesome that’s easy to whip up without sacrificing flavor.
This recipe turns humble chickpeas into a creamy, satisfying pasta dish without any dairy or soy, proving that comfort food can be both simple and plant-based. I love how it’s a weekend improvisation that became a weekly staple, especially when I need something quick but nourishing after a long day.
The story behind this recipe
- This recipe came together one rainy afternoon when I was rummaging through my pantry, looking for something quick but satisfying. I remembered how I used to avoid chickpeas because I thought they were boring, but blending them into a sauce changed everything. It was a moment of kitchen curiosity that turned into a regular dinner fallback.
- The inspiration struck when I wanted a plant-based dish that didn’t rely on fake cheeses or complicated ingredients. Chickpeas, with their neutral flavor and creamy texture, became my secret weapon. Now, whenever I need comfort food that’s simple and wholesome, this pasta is my answer.
- I love how this dish reminds me that good meals don’t have to be fancy. Sometimes, just a can of chickpeas and a few pantry staples can create something incredibly satisfying. It’s a reminder to keep things honest and flexible—flavor over fuss every time.
Ingredient breakdown: key components
- Chickpeas: I love how their neutral, slightly nutty flavor blends into a silky sauce; you can swap in white beans for a milder taste, but the chickpeas give it that hearty, oozing texture.
- Garlic: It’s the backbone of this dish, releasing a fragrant aroma that makes everything feel cozy; if you’re sensitive to raw garlic, roast it first for a sweeter, less punchy note.
- Lemon juice: Brightens the sauce with a zing that cuts through the creaminess; skip it if you prefer a subtler flavor, but don’t forget to add a splash at the end for that fresh lift.
- Nutritional yeast: Adds cheesy depth without dairy, giving the sauce a subtle umami; you can substitute with a pinch of smoked paprika for a different smoky warmth, but the yeast keeps it classic.
- Olive oil: It coats everything in a rich, fruity shine and helps blend the sauce smoothly; a good extra virgin is worth it, but if you’re out, a neutral oil works—just skip the fruity aroma.
- Pasta: I prefer a hearty, slightly textured shape like fusilli or rigatoni that holds the sauce well; but any pasta will do, just cook until al dente for the best bite.
- Salt and pepper: They’re the finishing touch, balancing and amplifying all the flavors; taste as you go—sometimes, a pinch more salt makes all the difference.
Spotlight on key ingredients
Chickpeas:
- I love how their neutral, slightly nutty flavor blends into a silky sauce; you can swap in white beans for a milder taste, but the chickpeas give it that hearty, oozing texture.
- Garlic: It’s the backbone of this dish, releasing a fragrant aroma that makes everything feel cozy; if you’re sensitive to raw garlic, roast it first for a sweeter, less punchy note.
Lemon juice and nutritional yeast:
- Lemon juice: Brightens the sauce with a zing that cuts through the creaminess; skip it if you prefer a subtler flavor, but don’t forget to add a splash at the end for that fresh lift.
- Nutritional yeast: Adds cheesy depth without dairy, giving the sauce a subtle umami; you can substitute with a pinch of smoked paprika for a different smoky warmth, but the yeast keeps it classic.
Notes for ingredient swaps
- Dairy-Free: Use coconut cream or cashew cream instead of nutritional yeast for a richer, nuttier flavor. It adds creaminess without the cheese-like note.
- Gluten-Free: Swap regular pasta for rice noodles or gluten-free chickpea pasta. Keep an eye on cooking times; they vary more than wheat pasta.
- Oil Options: Substitute olive oil with avocado oil for a milder, buttery flavor or toasted sesame oil for a smoky hint, but use sparingly.
- Lemon Juice: Replace with lime juice for a slightly different citrus note or a splash of vinegar if you prefer less brightness.
- Garlic: Use roasted garlic for a sweeter, mellower flavor or garlic powder if fresh isn’t available. Adjust to taste, as dried can be more concentrated.
- Herbs: Fresh parsley or basil can brighten the dish, but dried herbs like oregano or thyme work well too, just use less.
- Salt: Sea salt or Himalayan pink salt can be substituted, depending on your preference; taste as you go to avoid over-salting.
Equipment & Tools
- Large pot: Boil pasta efficiently in salted water.
- Blender or immersion blender: Puree chickpeas into a smooth, creamy sauce.
- Skillet or frying pan: Warm and toss the sauce and pasta together.
- Spatula or spoon: Stir and combine ingredients smoothly.
Step-by-step guide to chickpea pasta
- Gather your equipment: a large pot for boiling pasta, a high-speed blender or immersion blender, a skillet for sauce, and a spatula or spoon for stirring.
- Bring a large pot of salted water to a boil at 100°C (212°F). Cook the pasta until just al dente, about 8-10 minutes, depending on the type. Drain and set aside.
- While the pasta cooks, drain and rinse a can of chickpeas. Reserve a few for garnish if desired.
- In the blender, combine chickpeas, 2 cloves garlic (roughly chopped), juice of 1 lemon, 2 tablespoons olive oil, 2 tablespoons nutritional yeast, and a pinch of salt and pepper. Blend until smooth and creamy. If too thick, add a splash of water or plant-based milk to loosen.
- Heat a skillet over medium heat (about 160°C / 320°F). Pour in the chickpea sauce and warm for 2-3 minutes, stirring regularly. It should shimmer and smell garlicky and lemon-bright.
- Add the cooked pasta directly into the skillet. Toss well to coat every piece in the creamy chickpea sauce. Cook for another 1-2 minutes until heated through. The sauce should cling smoothly and have a slight sheen.
- Taste and adjust seasoning—more lemon, salt, or pepper if needed. If the sauce thickens too much, splash in a bit more water or oil to restore creaminess.
- Remove from heat. Let sit for 1-2 minutes to allow flavors to meld. Plate the pasta, garnish with reserved chickpeas or fresh herbs if you like, and serve immediately.
Let the pasta sit for 1-2 minutes off heat to settle flavors. Serve hot, garnished with extra chickpeas or herbs for color and texture.
How to Know It’s Done
- Sauce is smooth, silky, and coats pasta evenly.
- Pasta is al dente, with a slight bite and no raw flour taste.
- Aromatic garlic and lemon are fragrant, not burnt or raw.
Creamy Vegan Chickpea Pasta
Ingredients
Equipment
Method
- Bring a large pot of salted water to a boil and cook your pasta until just al dente, about 8-10 minutes. Drain and set aside.
- While the pasta cooks, drain and rinse your can of chickpeas. Measure out a few for garnish if desired.
- In a blender, combine the chickpeas, chopped garlic, lemon juice, olive oil, nutritional yeast, and a pinch of salt and pepper. Blend until smooth and silky, adding water or plant-based milk if needed to achieve a creamy consistency. The mixture should be bright and thick but pourable.
- Pour the chickpea sauce into a skillet over medium heat. Warm for 2-3 minutes, stirring gently until fragrant and slightly bubbling.
- Add the cooked pasta directly into the skillet with the sauce. Toss gently to coat every piece evenly, allowing the sauce to cling and shimmer on the pasta. Cook for another 1-2 minutes until heated through.
- Taste the pasta and adjust seasoning with more salt, pepper, or lemon juice if desired. If the sauce seems too thick, stir in a splash of water or plant-based milk to loosen it.
- Transfer the pasta to serving bowls, garnish with reserved chickpeas or fresh herbs if you like, and enjoy immediately while warm and silky.
Tips for perfect chickpea pasta
- Bolded mini-head: Use high-quality olive oil for a richer, fruitier flavor that shimmers in the sauce.
- Bolded mini-head: Blend chickpeas until completely smooth—lumps will make the sauce gritty, so patience is key.
- Bolded mini-head: Add lemon juice off the heat to preserve its bright, zesty flavor and prevent bitterness.
- Bolded mini-head: Cook pasta just to al dente—overcooked pasta becomes mushy and can absorb too much sauce.
- Bolded mini-head: Warm the sauce gently, avoiding high heat, to keep it silky and prevent separation or burning.
- Bolded mini-head: Reserve some pasta water when draining—starchy water helps loosen the sauce if it thickens.
- Bolded mini-head: Taste and adjust seasoning at the end—sometimes a pinch more salt or lemon lifts the whole dish.
Common mistakes and how to fix them
- FORGOT to check salt levels → Taste and adjust before serving.
- DUMPED pasta too early → Cook until just al dente, then drain thoroughly.
- OVER-TORCHED sauce → Lower heat immediately and add water to loosen.
- MISSED blending chickpeas completely → Blend until silky, no lumps left for smooth sauce.
Quick fixes and pantry swaps
- If sauce is too thick, splash in hot water or plant milk to loosen it up.
- When pasta sticks, toss with a little olive oil before storing or reheating.
- Splash lemon juice at the end for extra brightness and to brighten dull flavors.
- Patch burnt sauce by removing from heat immediately and stirring in fresh, warm chickpea puree.
- Shield from overcooking by setting a timer and tasting often—aim for al dente pasta and silky sauce.
Prep, store, and reheat tips
- Cook the pasta ahead of time, then toss with a little oil to prevent sticking; store in an airtight container in the fridge for up to 2 days. Reheat in a hot skillet with a splash of water until steaming and silky.
- Prepare the chickpea sauce up to 2 days in advance. Keep in a sealed jar or container in the fridge. The flavors will deepen, and the sauce may thicken—stir in a bit of water or plant milk during reheating to restore creaminess.
- For longer storage, freeze the cooled sauce in portions for up to 1 month. Thaw overnight in the fridge, then reheat gently, stirring often, until hot and fragrant.
- Reheating will intensify the garlic and lemon aroma, making the dish feel even more comforting. Expect the texture to be slightly thicker—adjust with a splash of water or oil to loosen it up.
Top questions about chickpea pasta
1. Can I use dried chickpeas instead of canned?
Yes, canned chickpeas blend into a smooth, creamy sauce, giving the dish a hearty, oozing texture with a subtle nutty flavor. Rinse them well first.
2. How do I prepare dried chickpeas for this recipe?
Absolutely, but you’ll need to cook dried chickpeas first, which takes about an hour. Use cooked chickpeas in the same amount and blend as usual.
3. Can I use other beans instead of chickpeas?
You can swap in white beans or cannellini beans for a milder, creamier sauce without changing much of the flavor profile.
4. How can I add more depth to the sauce?
Yes, for a smoky twist, add a pinch of smoked paprika or a splash of liquid smoked chipotle. It deepens the flavor without overpowering.
5. Is this recipe gluten-free?
Use gluten-free pasta if needed. Rice noodles or corn pasta work well, but adjust cooking times as they can vary more than wheat pasta.
6. What can I substitute for nutritional yeast?
Yes, you can replace nutritional yeast with a pinch of smoked paprika or a splash of soy sauce for umami, but expect a different flavor profile.
7. My sauce is too thick, what do I do?
If the sauce gets too thick, stir in a splash of hot water or plant-based milk until it reaches your desired creaminess. It should shimmer and coat the pasta evenly.
8. Can I skip the lemon juice?
Use freshly squeezed lemon juice at the end of cooking to keep that bright, zingy flavor. Bottled lemon juice can work in a pinch but won’t be as vibrant.
9. Can I make this ahead?
Absolutely, you can prepare the sauce up to 2 days ahead. Keep it covered in the fridge and reheat gently until steamy and fragrant.
10. How long does leftovers last?
Yes, store leftovers in an airtight container in the fridge for up to 2 days. Reheat in a skillet with a splash of water or oil until hot and silky.
This dish isn’t just about chickpeas and pasta; it’s about finding comfort in simple, honest ingredients that come together quickly. I love how it’s a reminder that nourishing food can be both humble and satisfying, especially when time is tight.
Whenever I make this, I think about how a few pantry staples can turn into something nourishing and genuinely delicious. It’s a little moment of kitchen ingenuity that keeps me coming back, even on the busiest nights.